Basic Tests before creating a UI pull request
NOTE: This is a working draft, to replace another page. Do not edit or delete.
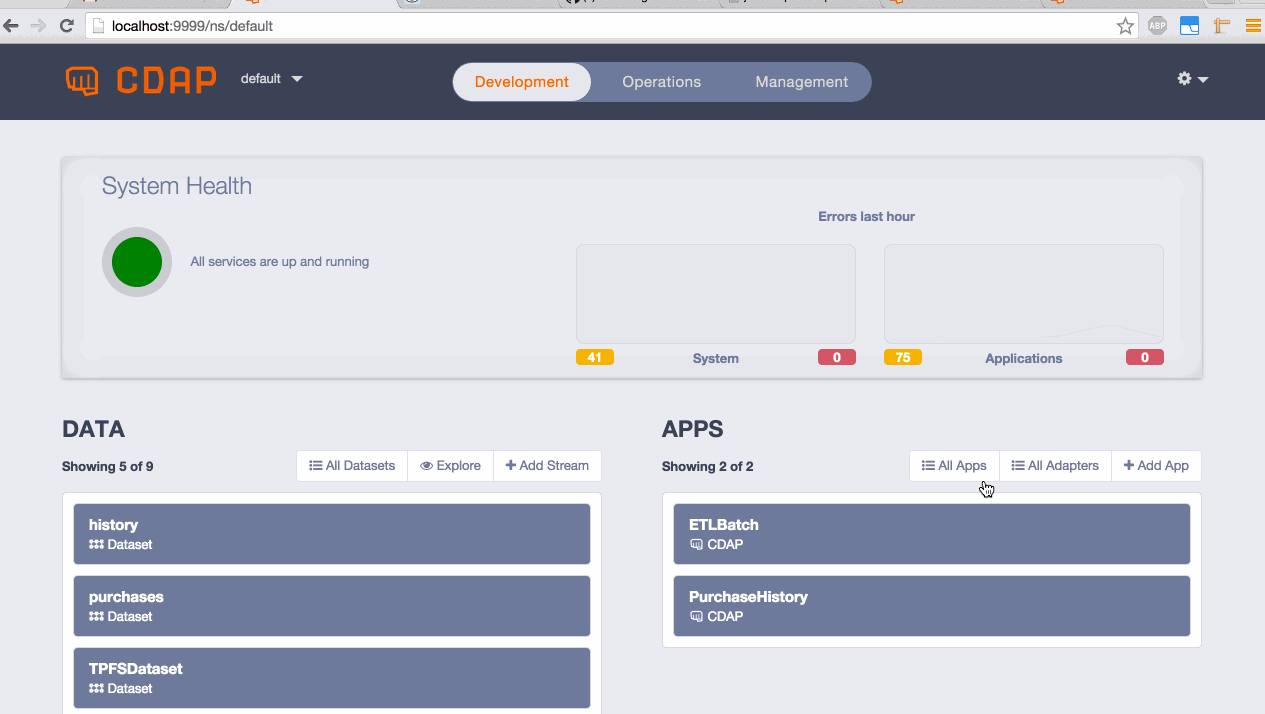
This document summarizes basic CDAP use-cases. This basic testing is to be performed in the CDAP UI before creating a PR.
Updated as of version CDAP-3.4.0.
Functional Tests
Use Case 1: How a Purchase is tracked and processed
This use case skims through the developer section of the CDAP UI to test how a purchase history app is supposed to be used.
These tests check that Apps, Flows, MapReduce and Spark Programs, Services, Workflows, Datasets, Streams, and Explorer work fine for the base use-cases.
Objective: In summary, what we are testing: we have a flow through which we can inject events—which then writes it to a dataset—a Workflow/MapReduce will read from the dataset, process it and write it to another dataset, while a Service helps us in viewing the data (we could do the same thing with Explorer, too). Here, the purchases dataset stores all purchases made by the user and the history dataset stores the history of purchases made by the user.
Testing a Flow
- Deploy PurchaseHistory (Purchase) app
- Go to the app's detailed view
- Go to PurchaseFlow
- Start the flow
- Inject events into the stream of a flow from the CDAP UI: it should show the count of events on the stream flowlet
- See if the events flow through all the flowlets and reach the collector
- Stop the flow
- Go to the Datasets tab: should show the datasets
- Go to History: should show the run history that we just started
- Go to purchases dataset: schema page should show storage as a few bytes as we just added some events to the stream
- Go to the Explore tab and execute the default "select *" query: should show the results in the table (events we injected)
GIF demonstrating these steps: TestingFlow
Testing a Workflow/MapReduce
- Go to PurchaseHistoryWorkflow
- Start the Workflow: this should pick up the events injected into the stream of a flow
- Mapreduce should run fine: initially having green border and once completed, should be shaded with green indicating success
- Click on the MapReduce program PurchaseHistoryBuilder to go the program and check its status: should show status as completed and switching between mappers and reducers should show proper metrics (Distributed CDAP only)
- Hit back and it should come back to the workflow run view
- Go to history Dataset: the status page should show storage as a few bytes.
- Exploring the dataset should show the history of purchases made by the user (Explore tab, execute query on the dataset).
GIF demonstrating these steps: TestingWorkflowMR.gif
Testing a Service
Service Use Case 1:
- Go to the PurchaseHistoryService and start it
- Make a request to the "/history/{customer}" endpoint, using a customer that we referred to in our stream injection
- Should show the list of purchases the user has made.
GIF demonstrating these steps: TestingService.gif
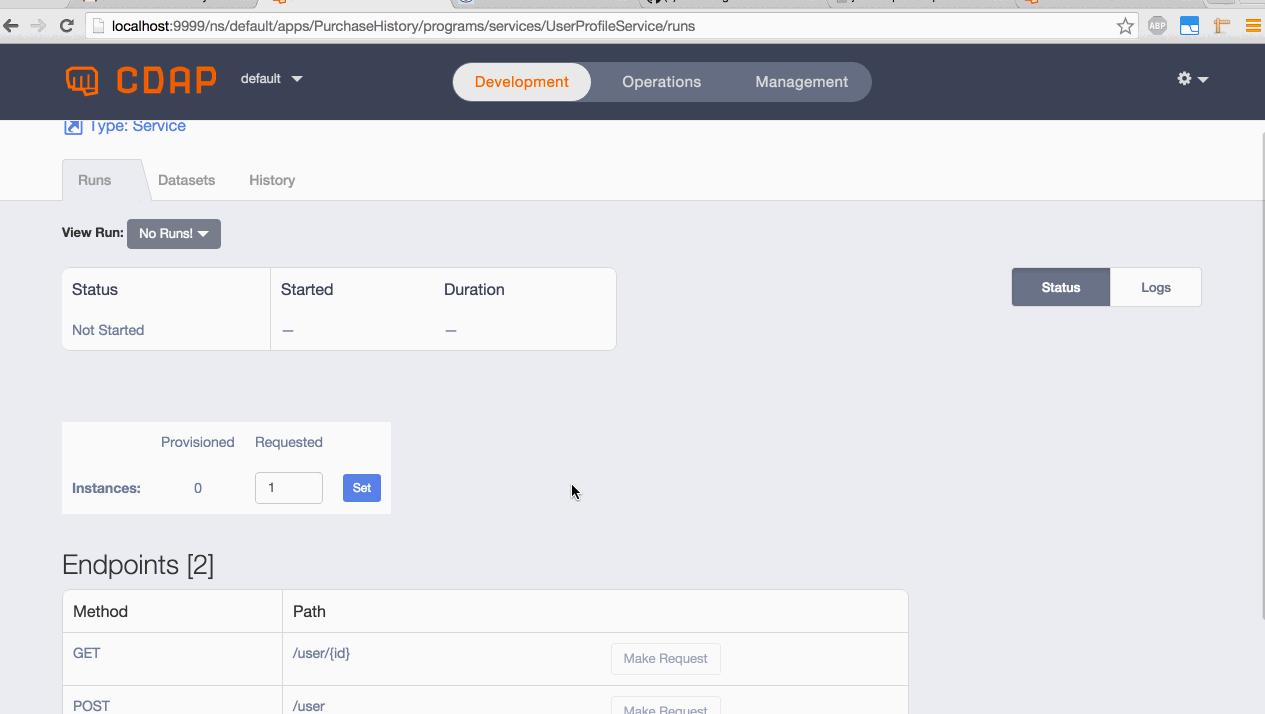
Service Use Case 2:
- Go to the UserProfileService and start it
- Make a POST call to the "/user" endpoint with this JSON:
  {
   "id":"Alice",
   "firstName":"Alice",
   "lastName":"Bernard",
   "categories":["fruits"]
} - Go to the flow and inject events in the name of Alice
- Go to the PurchaseHistoryWorkflow, start it and wait until it completes successfully
- Go to the PurchaseHistoryService again and make the same GET Request as we did above "/user/{customer}", using the customer "Alice"
- We should be able to see the User profile in addition to the purchase history information in the response
GIF demonstrating these steps: TestingService.gif
Testing a Spark Program
- Deploy the SparkPageRank app
- Start SparkPageRankService
- Inject data by running
./bin/cdap-cli.sh load stream backlinkURLStream examples/SparkPageRank/resources/urlpairs.txt - Go to SparkPageRankProgram
- Click PageRankWorkflow to get to the workflow detail page, set the runtime arguments using
spark.SparkPageRankProgram.argsas the key and3as the value, then click the Start button - Go to PageRankSpark program
- You should see the metrics ("Storage", "Stages") being updated in the page
TODO: Add GIF demonstrating these steps
Use Case 2: How a Pipeline works
These base cases should work. If not, something is wrong; the UI should say what is the error.
Objective: See if an adapter can convert a stream that is of CSV format to a TPFSAvro dataset that we use internally anywhere.
Testing Pipeline Creation
- Click "Add Application" in CDAP UI Home page and select "Hydrator Pipeline"
- Choose the pipeline type, "Batch" or "Realtime"
- "Batch" pipeline
- Give pipeline a name: "BatchTest"
- Setup Source: a Stream source, click in left sidebar
- Give Stream a name: "BatchTestStream"
- Set Duration to 1m
- Set Delay to "0"
- Set Format to "text"
- Set Schema:
- Remove all existing
- Add a "body" of type string
- Setup a Transform: Projection transform
- Fields to Drop:
- headers
- Fields to Drop:
- Setup Sink: a TPFSAvro sink
- Give Dataset a name: "BatchTestDataset"
- Set Schema:
- ts (type long)
- body (type string)
- Schedule it for every 5 mins: enter in the "Pipeline Configuration": "Cron Expression", under "Min": "0/5"
- Save, Validate, and then Publish the pipeline
- This base case should work. If not, something is wrong and the UI should say what is the error
- Once the pipeline is created, send one or more events to the stream using the CDAP UI
- Either start the pipeline manually or wait until the pipeline runs on the schedule
- Every 5 mins, the dataset associated with the pipeline should be injected with data you injected through the stream
- Explore the sink dataset. You should see the events you sent to the stream.
- "Realtime" pipeline
GIFs explaining the above steps: AdapterTest1.gif and TestingAdapter2.gif
Objective: See if an adapter can convert a stream that is of CSV format to a TPFSAvro dataset that we use internally anywhere.
TODO: For metrics, we need a basic test case.
Once the above-mentioned steps work, push the code to two different clusters, a "secure" and a "non-secure" cluster (beamer software install cluster_id cdap-ui : should take 5 mins to beam code to a cluster)
Once the cluster is up and running, we should provide the cluster url and a GIF of our test. This helps for the reviewer to assume that the feature/bug fix works and can then start reviewing the code.
Behavioral Tests
This is more of an open-ended section which depends on the user/developer to test their UI extensively. This needs more thought and automated tests to run.
Created in 2020 by Google Inc.