...
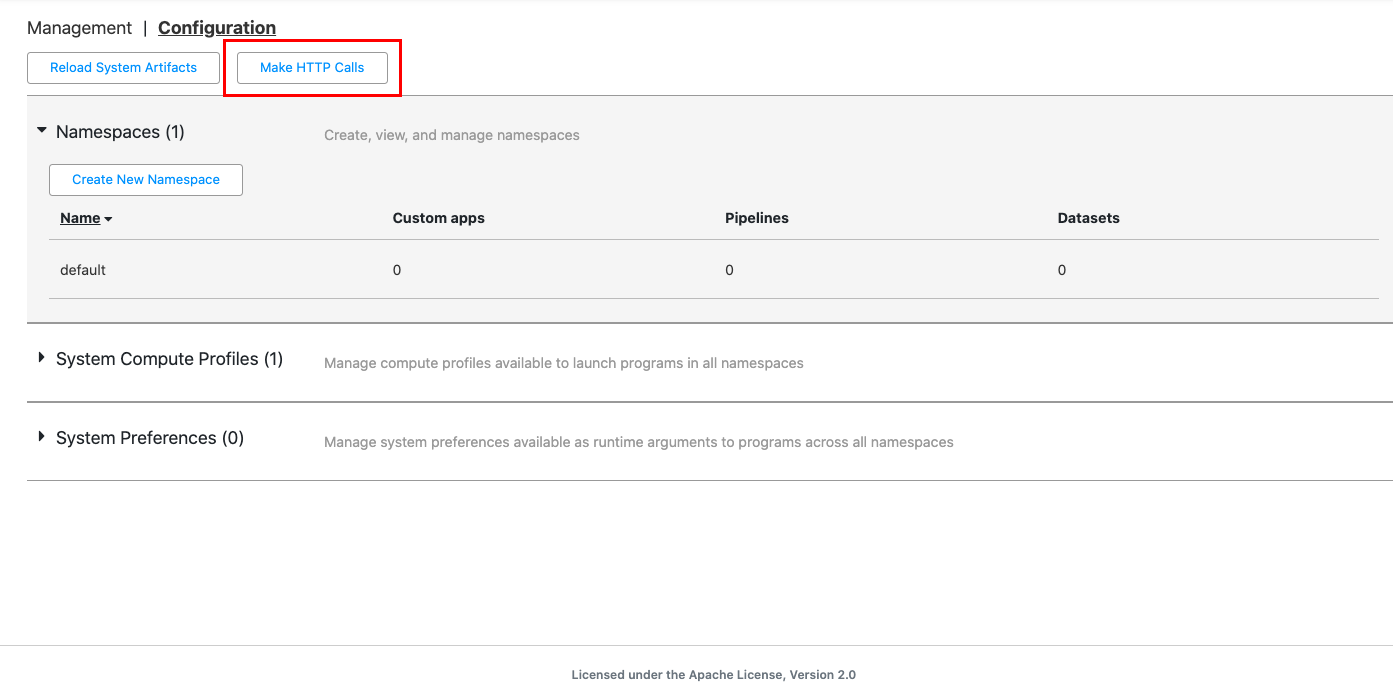
In CDAP, open the HTTP interface. Click System Admin > Configuration > Make HTTP Calls.
Issue the following PUT command:
namespaces/<namespace-id>/securekeys/<secure-key-name>
with a JSON-formatted body that contains the description of the key, the data (password) to be stored under the key, and a map of descriptive properties associated with the key (these can help you identify the key in the future):Code Block { "description": "Example Secure Key", "data": "<secure-contents>", "properties": { "<property-key>": "<property-value>" } }For example, the following PUT command creates a secure key called
mykeywith a password oftest123.PUT namespaces/default/securekeys/mykeyJSON body:
{"description": "Example Secure Key","data": "test123","properties": {"<property-key>": "<property-value>"}}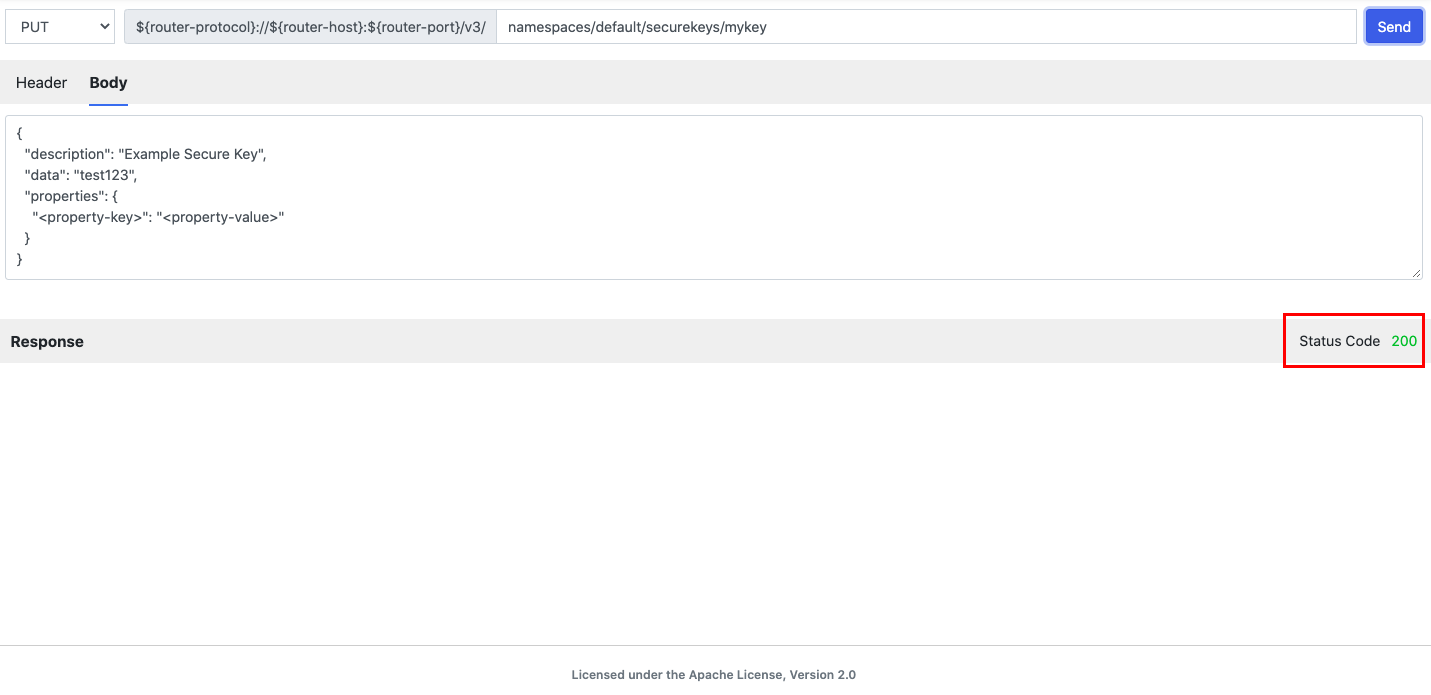
The Status Code: 200 means you successfully created the secure key to store the encrypted password for the database. CDAP saves the secure key in the secure store located in the
storefolder under your CDAP Sandbox installation directory.
Now that you’ve created a secure key, you can add it as a macro in the Password field of a Database plugin.In the Pipeline Studio, create a pipeline with a Database Batch Source plugin.
Click the Database plugin Properties button.
In the Password field, click the macro button and add a secure macro: The secure macro has the format
${secure(<secure-key-name>)}. In this example, add${secure(mykey)}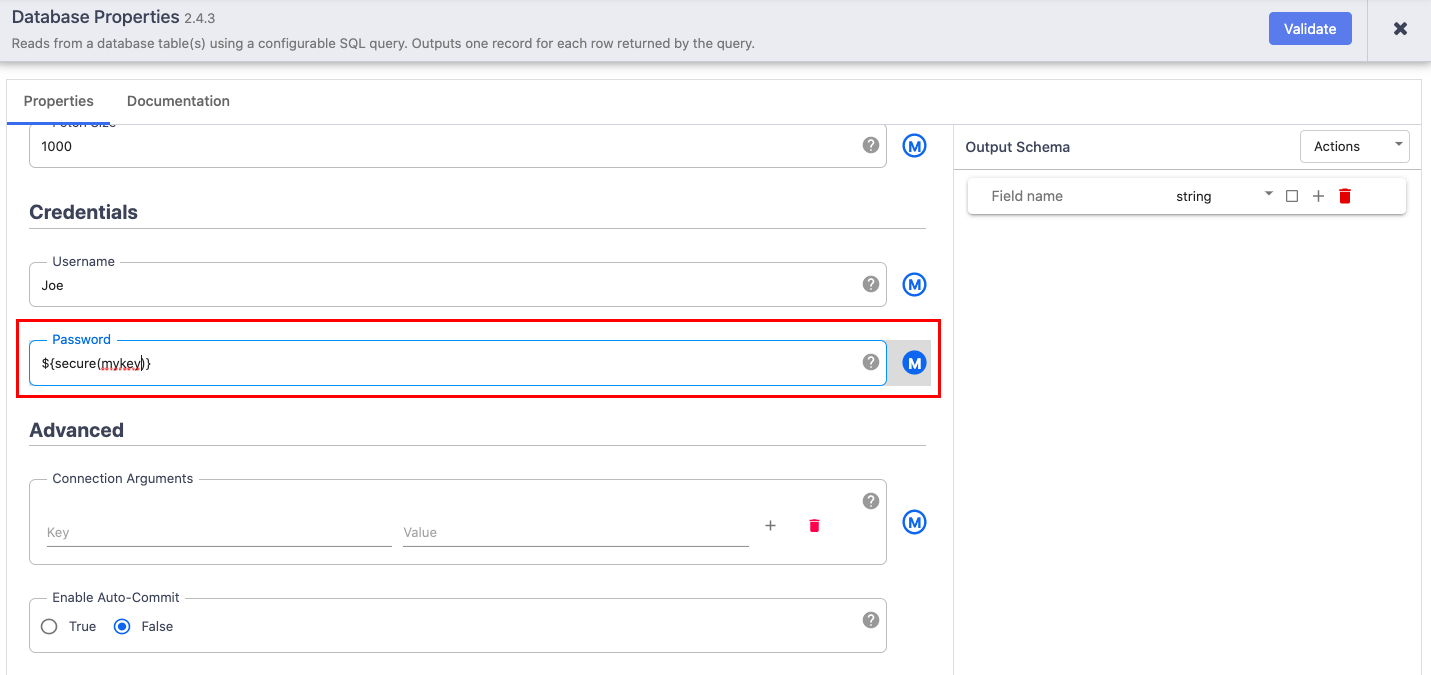
Build the rest of the pipeline and run it.
Example:
...
Using a Secure Key to a Compute Profile for a Dataproc Cluster
You’re using CDAP and want to use Dataproc as your provisioner. You also want to create a secure key for your Service Account in your compute profile for the Dataproc cluster.
...