...
Before opening the Pentaho Data Integration application, copy the
io.cdap.cdap.cdap-explore-jdbc-6.2.0.jarfile to thelibdirectory of Pentaho Data Integration, located at the root of the application's directory.Open Pentaho Data Integration.
In the toolbar, select File > New > Database Connection....
In the General section, select a Connection Name, such as CDAP Sandbox. For the Connection Type, select Generic database. Select Native (JDBC) for the Access field. In this example, where we connect to a CDAP Sandbox, our Custom Connection URL is
jdbc:cdap://localhost:11015. In the field Custom Driver Class Name, typeio.cdap.cdap.explore.jdbc.ExploreDriver.
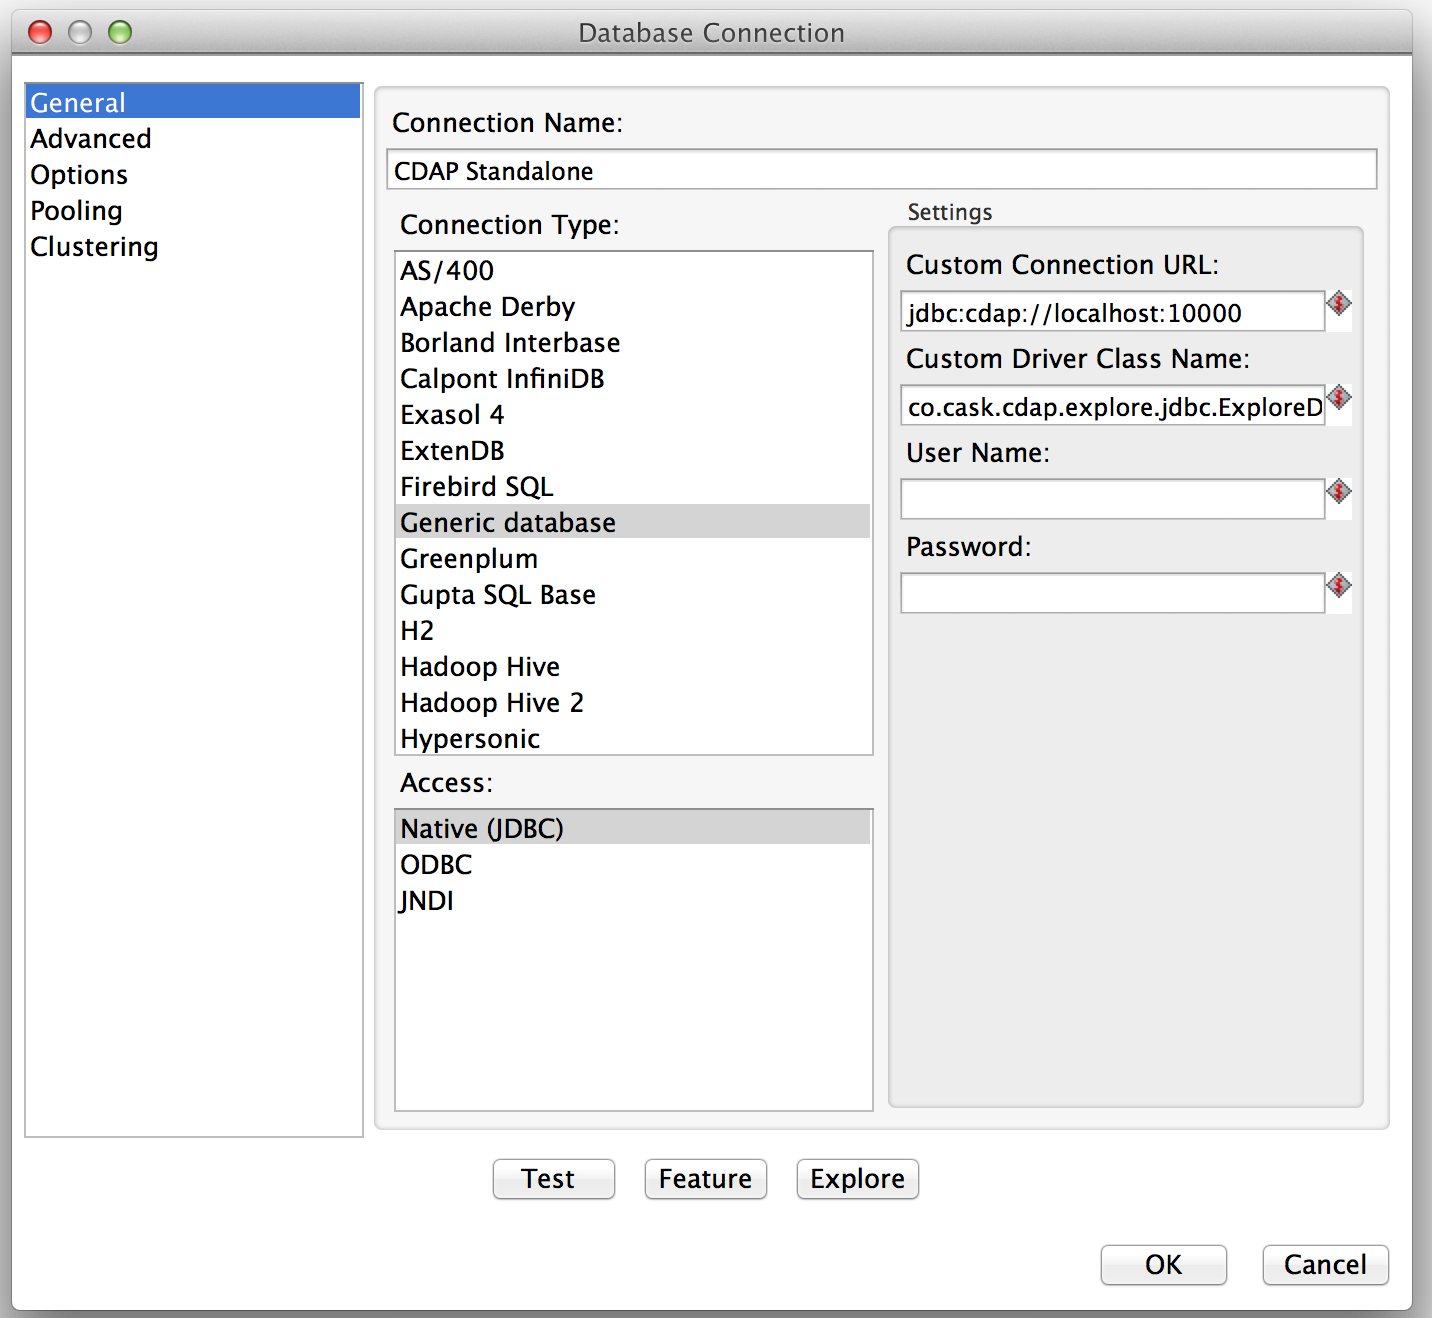
Click OK.
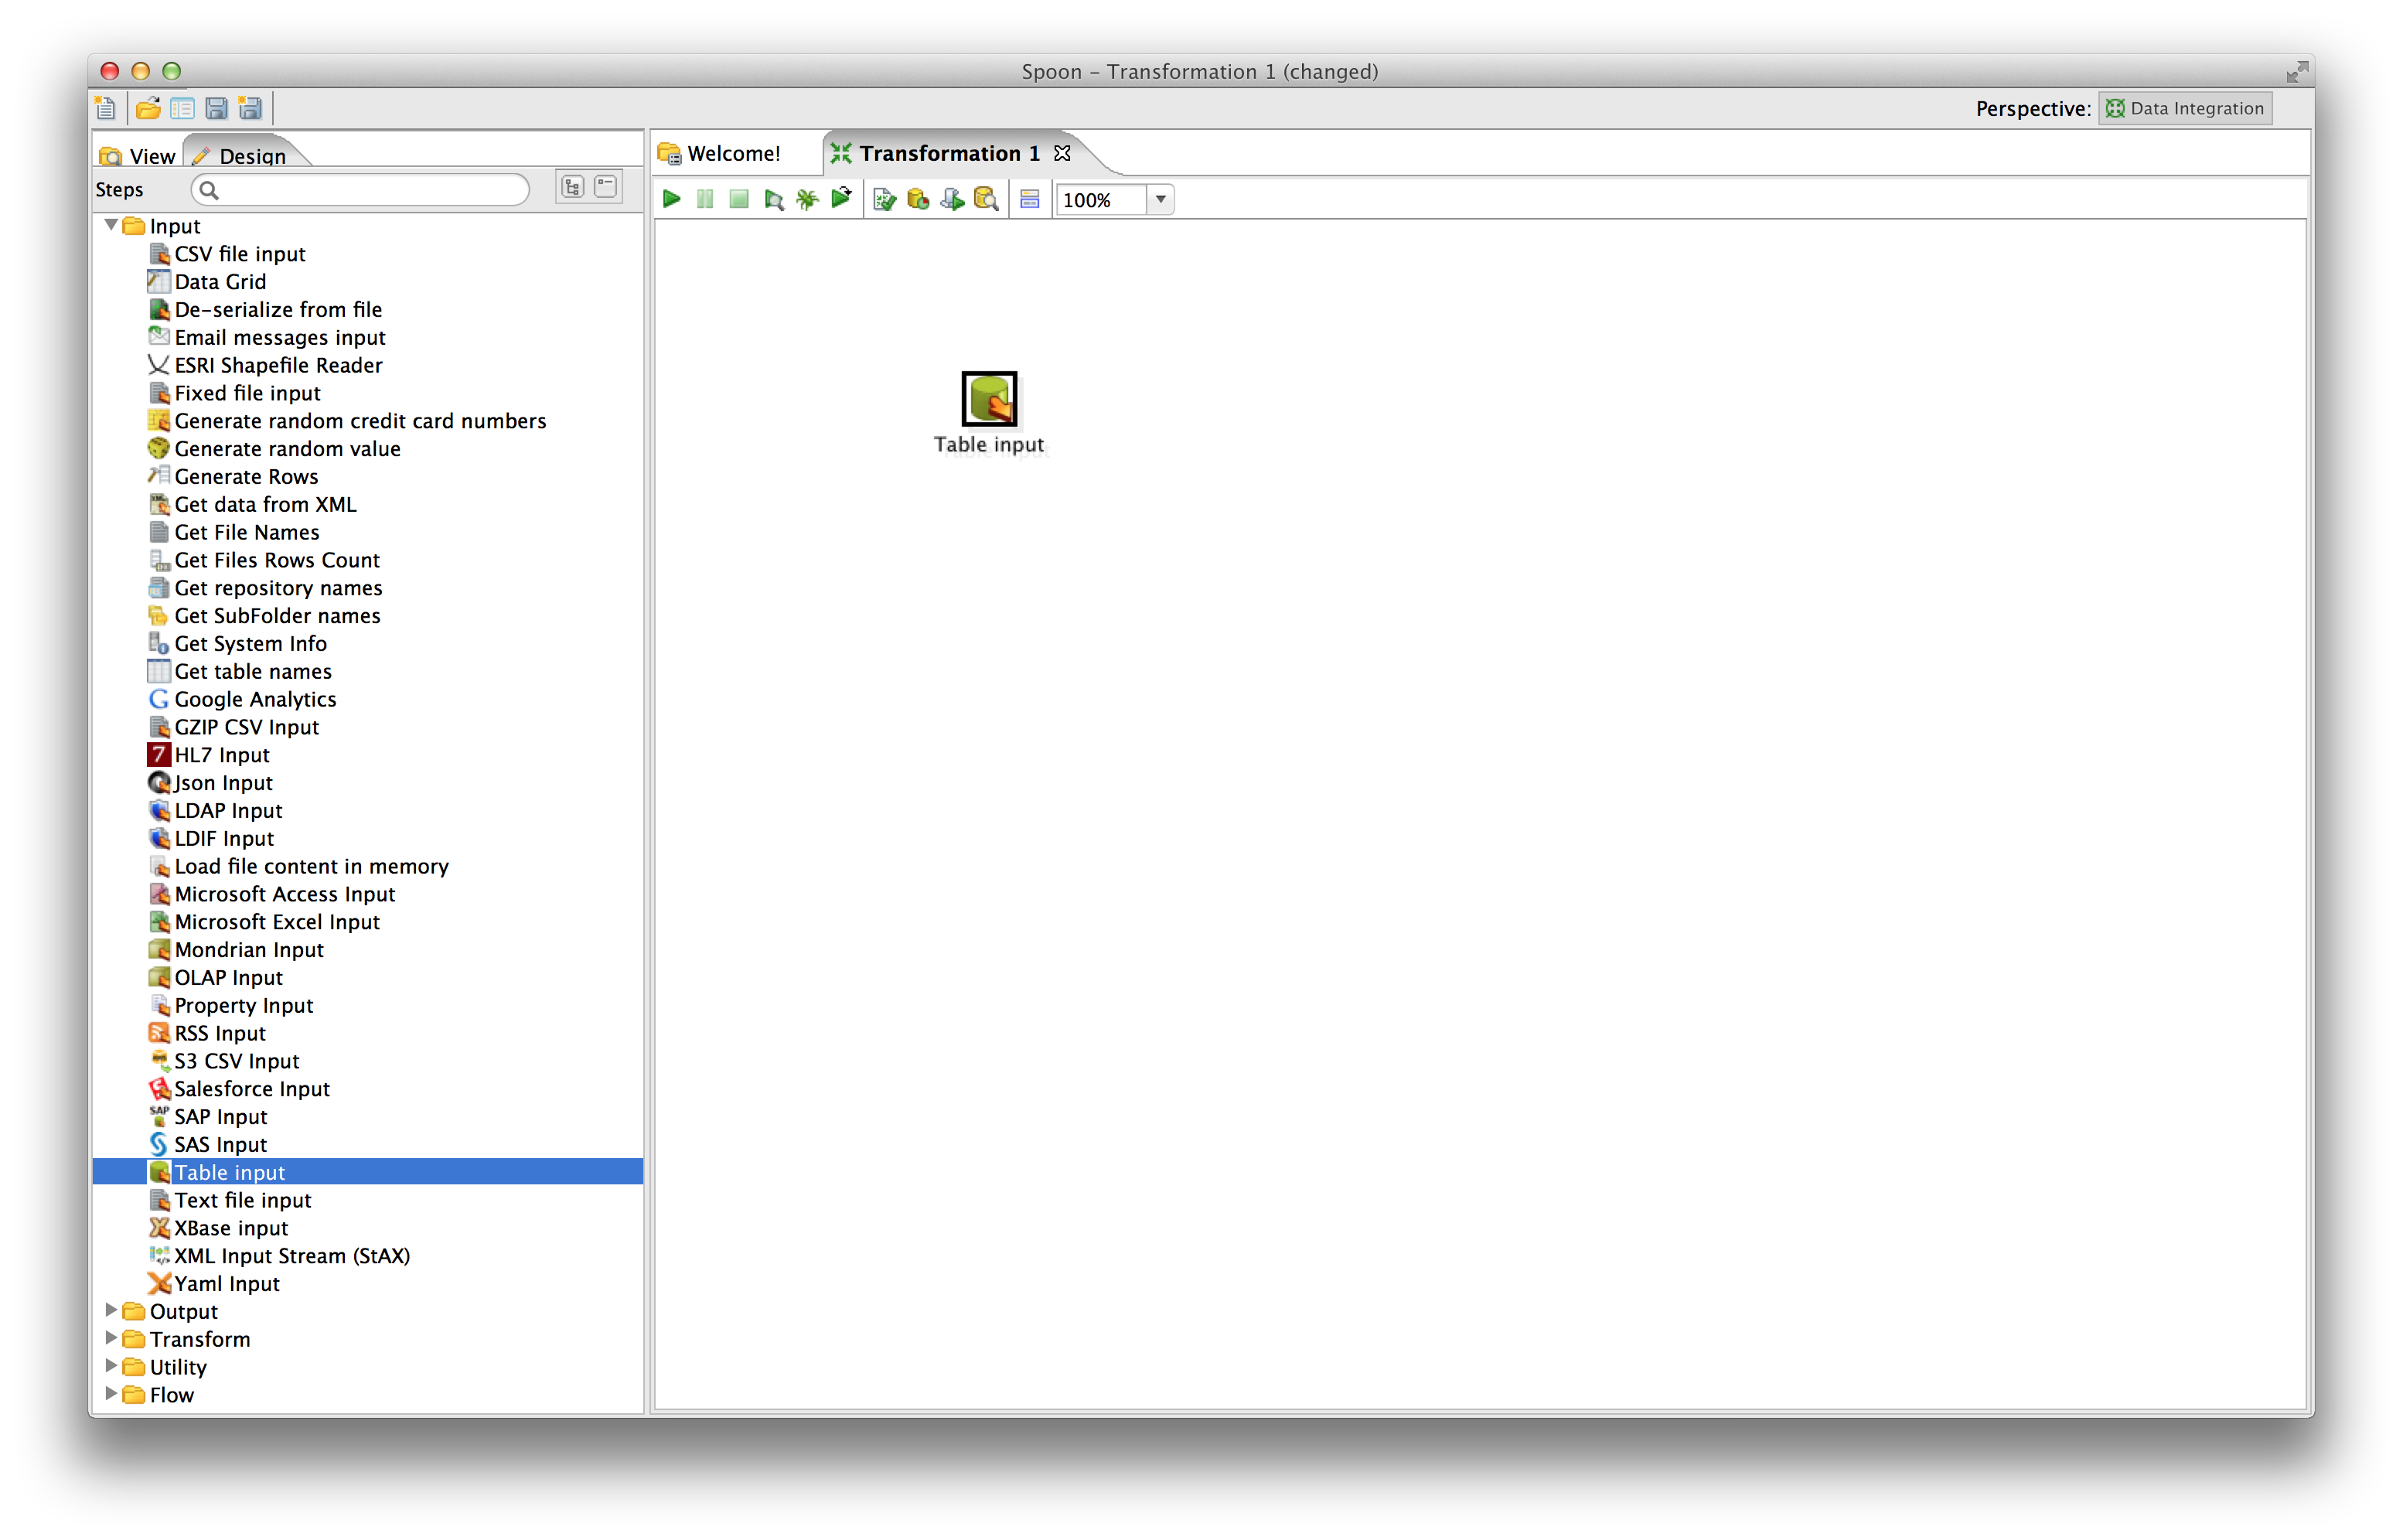
To use this connection, navigate to the Design tab on the left of the main view. In the Input menu, double click Table input. It will create a new transformation containing this input.

In your transformation, right-click Table input and select Edit step. You can specify an appropriate name for this input such as CDAP datasets query. Under Connection, select the newly created database connection. In this example, it’s CDAP Sandbox. Enter a valid SQL query in the main SQL field. This will define the data available to your transformation.

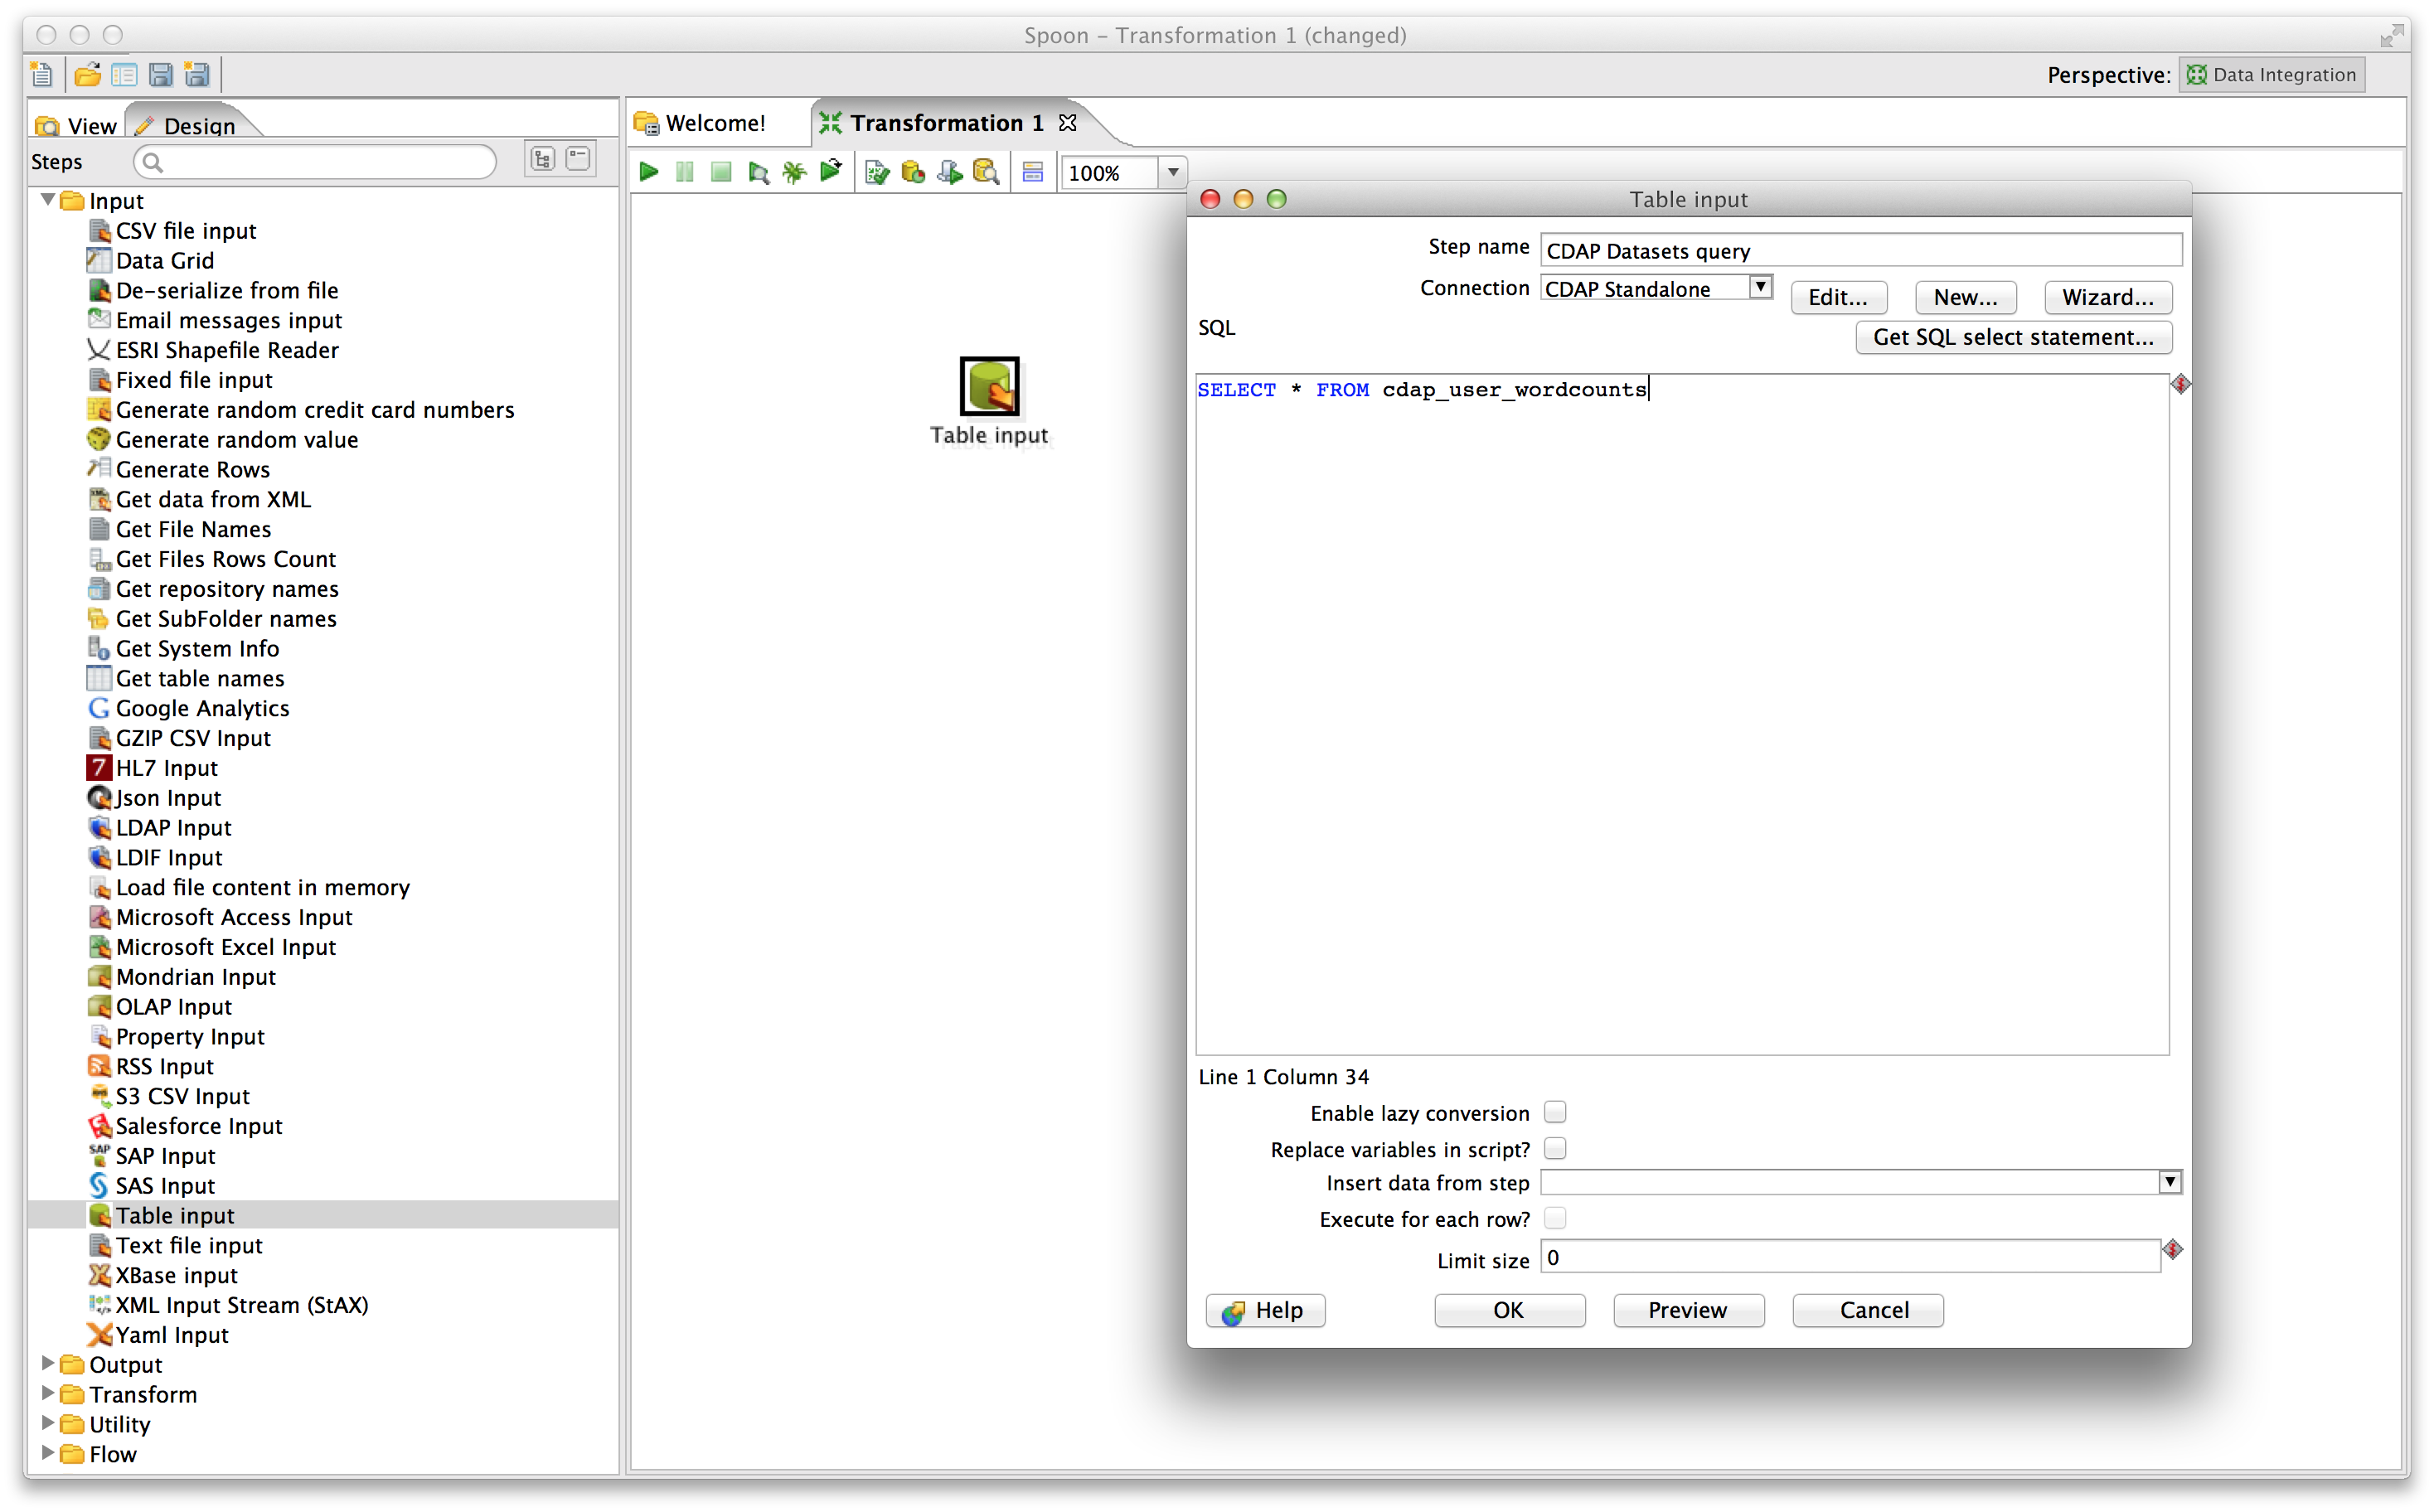
Click OK. Your input is now ready to be used in your transformation, and it will contain data coming from the results of the SQL query on the CDAP datasets.
For more information on how to add components to a transformation and link them together, see the Pentaho Data Integration page.