...
Reusable pipelines have a regular pipeline structure, but use macros to add dynamic reusable variables to plugin configurations so that you can specify the variable substitutions at runtime.
Fields that can be made dynamic reusable using macros have a blue M icon on the far right in the Plugin Configuration section:
...
Use the pricing calculator to generate a cost estimate based on your projected usage.
Before you begin
In the Google Cloud Console, on the project selector page, select or create a Google Cloud project.
Note: If you don't plan to keep the resources that you create in this procedure, create a project instead of selecting an existing project. After you finish these steps, you can delete the project, removing all resources associated with the project.
Make sure that billing is enabled for your Cloud project. Learn how to confirm that billing is enabled for your project.
Enable the Cloud Storage APIs.
Enable the APIsDownload the following sample file, args.json, and upload it to a GCS bucket. This is the JSON file that you’ll call from the GCS Argument Setter:
| View file | ||
|---|---|---|
|
Read from Cloud Storage
In the Pipeline Studio, add a GCS batch source to the canvas.

Click the Properties button.
In the Reference name field, enter a name.
In the Project ID field, enter your Google Cloud Project ID.
In the Path field, enter
${input.path}. This macro controls what the Cloud Storage input path will be in the different pipeline runs.(Optional) In the Output Schema panel, remove the offset field from the output schema by clicking the trash icon in the offset field row.
Recommended: The offset field isn’t required. Removing it for text sources is a best practice to include only required fields in a pipeline, which can help streamline troubleshooting and lineage analysis.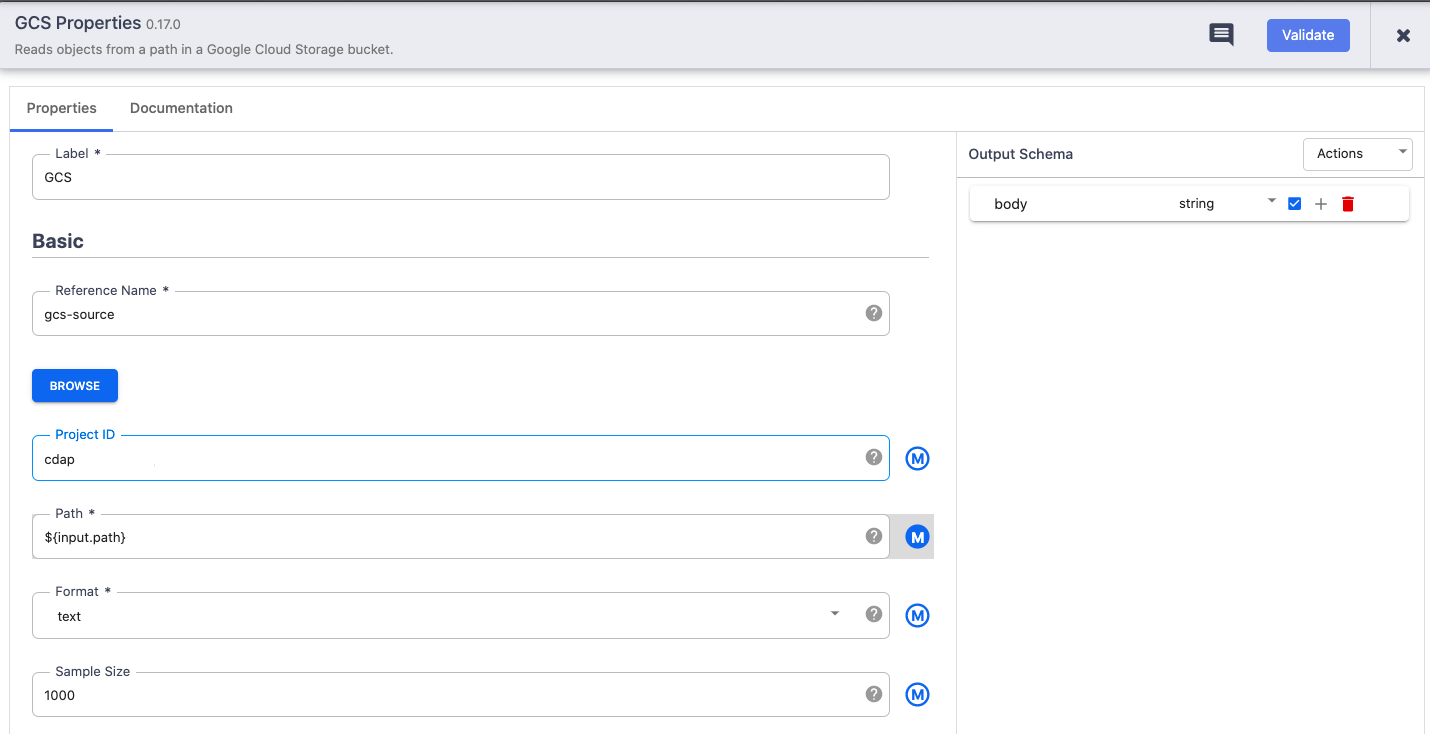
In the Format field, select text.
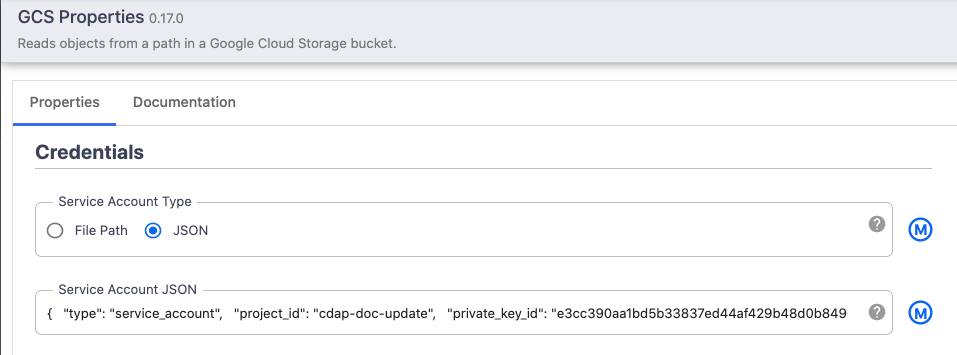
This is the format of the file that we’ll call in the GCS Argument Setter. The Format of the GCS source must match the format of the source file that is called in the GCS Argument Setter.For Service Account, select JSON.
In the Service Account JSON field, paste the entire contents of the Service Account JSON.
Click Validate to make sure you don't have any errors.
Click the X button to exit the Properties dialog box.
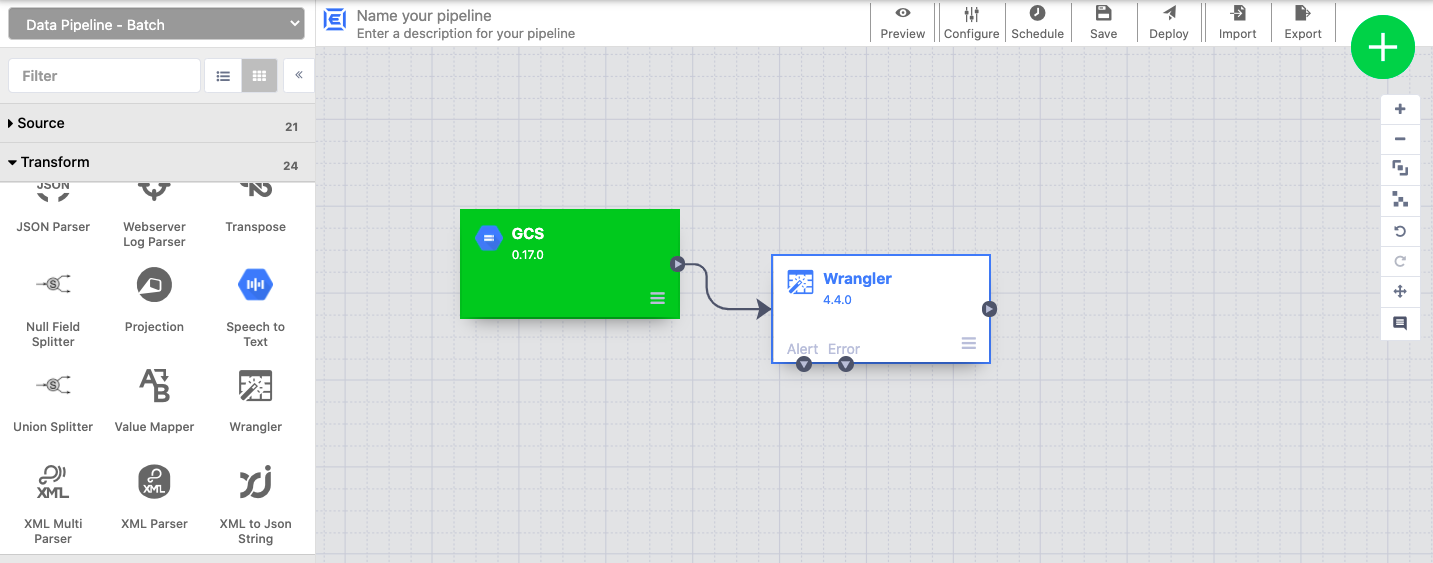
Transform your data
Add a Wrangler transformation to the pipeline.
On the Wrangler transformation, click the Properties button.
In Input field name, enter
body.In the Recipe field, enter
${directives}. This macro controls what the transform logic will be in the different pipeline runs.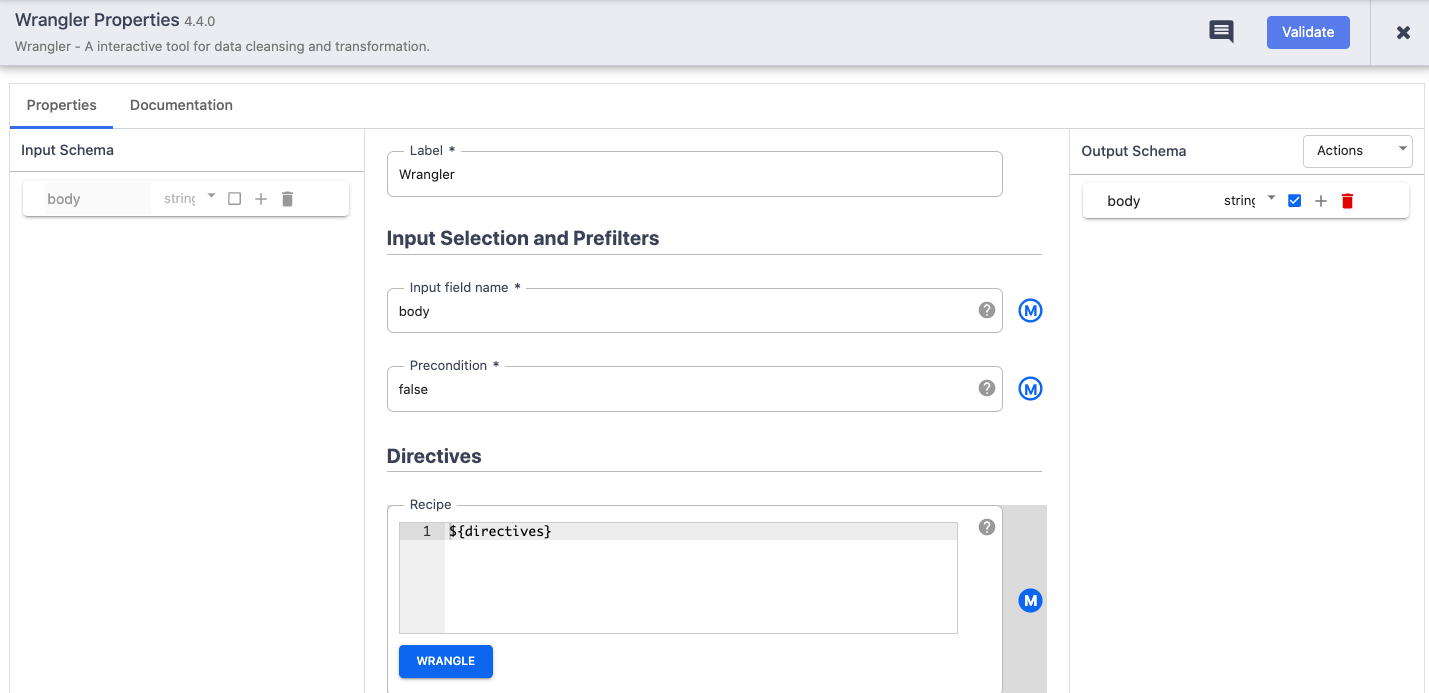
Click Validate to make sure you don't have any errors.
Click the X button to exit the Properties dialog box.
Write to Cloud Storage
Add a GCS sink to the pipeline.
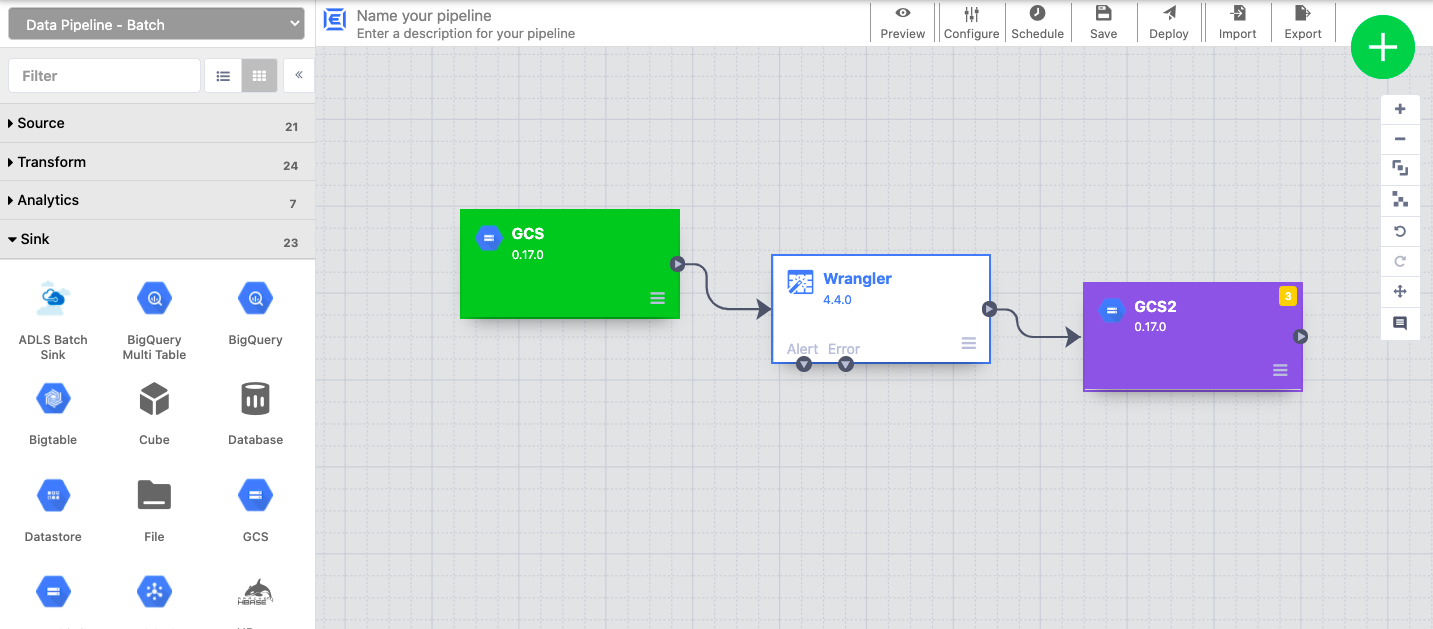
On the GCS sink, click the Properties button.
In the Reference name field, enter a name.
In the Path field, enter the path of a Cloud Storage bucket in your project, where your pipeline can write the output files. If you don't have a Cloud Storage bucket, create one.
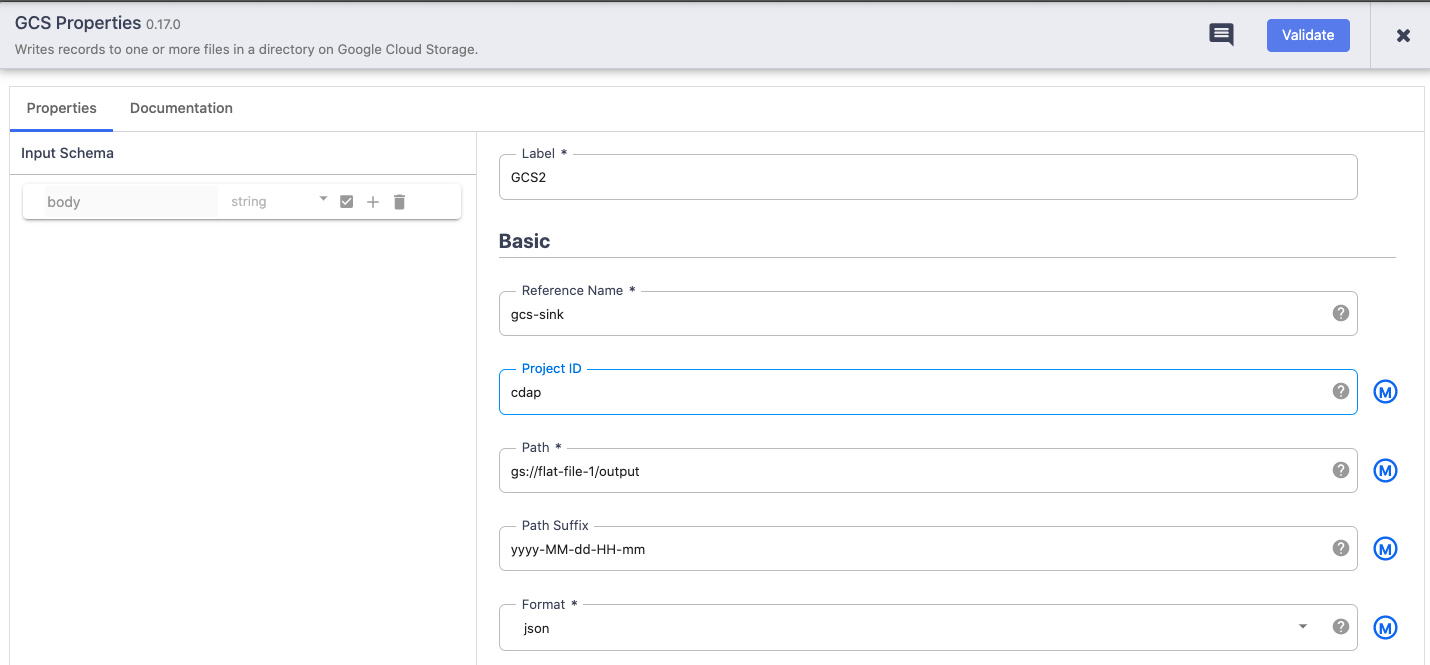
For Service Account, select JSON.
In the Service Account JSON field, paste the entire contents of the Service Account JSON.
In the Format field, select json.
Note: You can select any output format, but for this tutorial, we’ll write to a json file.Click Validate to make sure you don't have any errors.
Click the X button to exit the Properties menu.
Add the argument setter
From the Plugin Palette, under Conditions and Actions, select the GCS Argument Setter plugin.
In the Pipeline Studio canvas, connect the GCS Argument Setter to the GCS batch source.
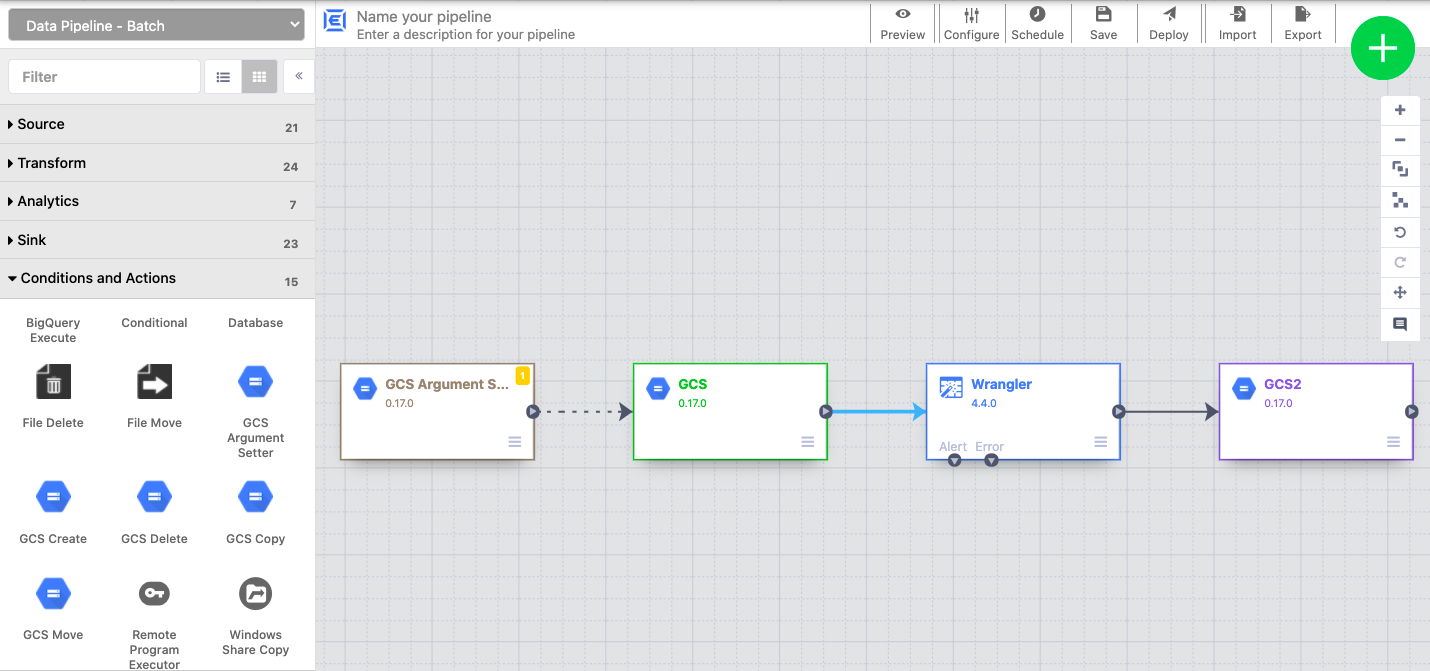
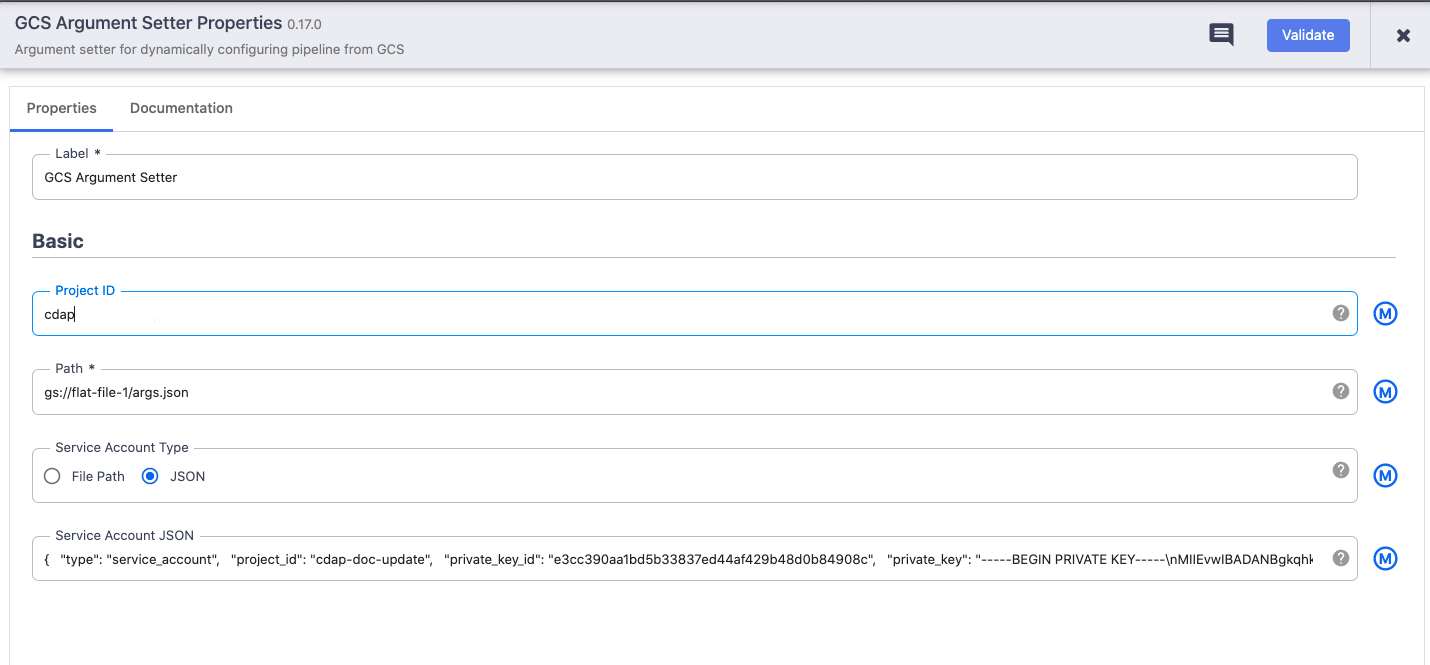
On the GCS Argument Setter plugin, click the Properties button.
In the Project ID field, enter your Google Cloud Project ID.
In the Path field, enter the path to the args.json file you uploaded to your bucket.
The file contains the following content:Code Block { "arguments" : [ { "name": "input.path", "value": "gs://reusable-pipeline-tutorial/user-emails.txt" }, { "name": "directives", "value": "send-to-error !dq:isEmail(body)" } ] }The first of the two arguments is the value for
input.path. The pathgs://reusable-pipeline-tutorial/user-emails.txtis a publicly accessible object in Cloud Storage that contains the following test data:Code Block alice@example.com bob@example.com craig@invalid@example.comThe second argument is the value for
directives. The valuesend-to-error !dq:isEmail(body)configures Wrangler to filter out any lines that are not a valid email address. For example,craig@invalid@example.comis filtered out.In the Service Account Type field, select JSON.
In the Service Account JSON field, paste the entire contents of the Service Account JSON.
Deploy and run your pipeline
In the top bar of the Pipeline Studio page, click Name your pipeline. Name your pipeline and click Save.
Click Deploy.
Next to Run, click the drop-down menu arrow_drop_down to open the Runtime Arguments and view the macro (runtime)
input.pathanddirectivesarguments. Leave the value fields blank to notify CDAP that the GCS Argument Setter plugin in the pipeline will set the values of these arguments during runtime.Click Run.
Cleaning up
To avoid incurring charges to your Google Cloud account for the resources used in this tutorial, either delete the project that contains the resources, or keep the project and delete the individual resources.
...
Everything in the project is deleted. If you used an existing project for this tutorial, when you delete it, you also delete any other work you've done in the project.
Custom project IDs are lost. When you created this project, you might have created a custom project ID that you want to use in the future. To preserve the URLs that use the project ID, such as an
appspot.comURL, delete selected resources inside the project instead of deleting the whole project.
In the Cloud Console, go to the Manage resources page.
In the project list, select the project that you want to delete, and then click Delete.
In the dialog, type the project ID, and then click Shut down to delete the project.